Creating a beautiful garden is a way many homeowners express their individuality and connect with nature. One of the most impactful ways to enhance your outdoor space is by adding garden pathways. Not only do these pathways provide functional access to various areas of your garden, but they also add charm and aesthetic appeal to your landscape.
The Benefits of Garden Pathways
Before diving into the how-to aspect of creating garden pathways, it’s essential to understand their benefits. Incorporating pathways into your garden design enhances functionality and improves the overall look of your space.
1. Enhanced Accessibility
Pathways make it easier to navigate your garden, allowing you to move between different sections without trampling plants or grass. This accessibility is particularly beneficial for larger gardens, ensuring you can enjoy your space fully.
2. Improved Aesthetics
A well-designed pathway can serve as a focal point in your garden. It draws the eye and adds structure to your landscape, creating a sense of direction and flow. You can choose shapes, colors, and materials that complement your garden design, enhancing its overall beauty.
3. Erosion Control
Pathways help control soil erosion by creating defined routes through your garden. This is especially important in areas with slopes or heavy rainfall. By using pathways, you can minimize the impact of foot traffic and protect your plants.
4. Easy Maintenance
With designated pathways, maintaining your garden becomes easier. Pathways can help prevent weeds from spreading, reduce lawn mower damage to flower beds, and simplify the process of watering and fertilizing.
5. Safety
Garden pathways can provide safe access to different areas of your landscape. This is particularly important in regions with uneven terrain, ensuring that visitors can navigate without tripping hazards.
Choosing the Right Material for Your Pathway
When planning your DIY garden pathway, consider the materials available. The right material can emphasize your garden's style, ensuring the pathway blends seamlessly with the landscape.
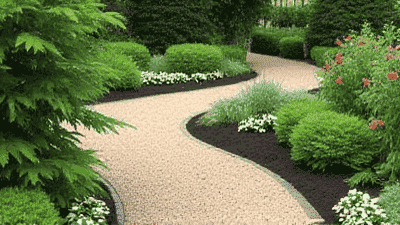
1. Gravel
Gravel is a versatile and affordable option for pathways. It comes in various colors and sizes, allowing you to create a unique look. Gravel pathways are easy to install and provide excellent drainage. However, they may require occasional replenishing and edging to maintain their shape.
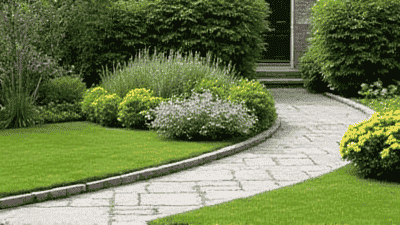
2. Pavers
Pavers come in various materials, including concrete, brick, and stone. They offer a clean and polished appearance and are highly durable. Pavers can be arranged in patterns, allowing for creative designs. However, they may require a more complex installation process compared to other materials.
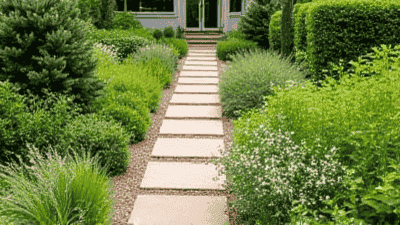
3. Flagstone
Flagstone is a natural stone that offers a rustic appeal. It can be laid in various patterns and provides an organic feel to your garden. Flagstone pathways are sturdy and durable but can be more expensive to install than gravel or pavers.
4. Mulch
Mulch pathways are typically made of wood chips, bark, or shredded leaves. They are affordable and provide a soft, earthy look. Mulch pathways can decompose over time and may need to be replenished regularly.
5. Concrete
Concrete pathways are durable and easy to maintain. You can pour concrete into molds to create various shapes and designs. Concrete is an excellent choice for modern landscapes but may require professional installation.
6. Wood
Wooden pathways can add warmth and an organic feel to your garden. They can be made using reclaimed wood, boards, or logs. However, wooden pathways require regular maintenance and may be prone to decay without proper treatment.
Designing Your Garden Pathway
Once you have chosen the right material for your pathway, it's time to plan the design. An attractive pathway should complement your garden’s layout and enhance the overall aesthetic.
1. Determine the Purpose and Location
Consider the primary purpose of your pathway. Will it provide access to specific areas, or will it serve as a decorative feature? Identify where the pathway will be located in relation to existing garden elements, such as flower beds, trees, or seating areas.
2. Choose the Style
The style of your pathway should align with your garden’s overall theme. Here are some popular styles to consider:
Straight Pathway: A straight path offers a clean and formal look, suitable for modern gardens.
Curved Pathway: Curved paths create a softer, more organic feel. They can lead the eye through the garden and highlight specific plants or features.
Winding Pathway: A winding path creates an enchanting feel, encouraging exploration and discovery within the garden.
3. Consider Width and Accessibility
Ensure your pathway is wide enough for comfortable navigation. A standard width of 3 feet allows for easy passage, while wider paths can accommodate two-way traffic. If you expect visitors, consider making the path accessible for those with mobility issues.
4. Incorporate Edging
Adding edging to your pathway can enhance its appearance and functionality. Edging materials like bricks, stones, or metal can help contain loose materials and prevent grass or weeds from encroaching.
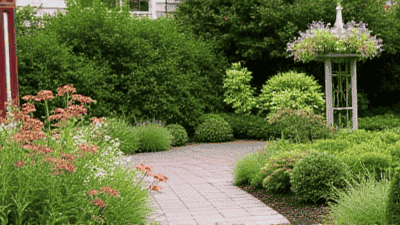
5. Plan for Landscaping
Think about how your pathway will integrate with the surrounding landscape. Plan for planting areas, seating locations, and focal points along the path. Use plants, flowers, and decorative elements to frame the pathway and draw attention to it.
Steps to Create Your DIY Garden Pathway
Now that you have chosen your materials and designed your pathway, it’s time to get started on the installation. Follow these steps to create your DIY garden pathway.
1. Gather Your Tools and Materials
Before you begin, make sure you have all the necessary tools and materials. Common tools needed for garden pathway installation include:
- Shovel
- Rake
- Level
- Tape measure
- Garden hose or stakes (for marking the path)
- Edging materials (if applicable)
- Compactor or tamper (for gravel or soil pathways)
2. Mark Your Pathway
Using a garden hose or stakes and string, outline the desired pathway layout on the ground. If opting for a straight path, use a tape measure to ensure accuracy. If the path is curved or winding, take your time to create smooth, natural lines.
3. Prepare the Ground
Remove any grass, weeds, or debris along the path. Use a shovel to dig down to a depth of 3 to 4 inches, ensuring a level surface to establish your base. If you're using a loose material like gravel or mulch, ensure the base is compact to prevent sinking over time.
4. Add Edging (If Applicable)
If you're using edging materials, place them along the outlined path to create a defined border. Ensure that the edging is level and stable to prevent movement. This will contain your pathway material and maintain its shape.
5. Install the Base Material
For gravel pathways, spread a layer of landscape fabric along the bottom of the excavated area to reduce weed growth. Then, evenly distribute your gravel, ensuring a depth of approximately 2 to 3 inches. Use a compactor to pack it down, creating a stable surface. For paver or flagstone installations, lay crushed stone as a base, compact it, and level it well.
6. Lay the Surface Material
For gravel, simply smooth the top layer and ensure it is evenly distributed. If using pavers or flagstone, lay them according to your design, making sure to leave small gaps between each piece for drainage, or fill in with sand to minimize shifting. For mulched pathways, spread an even layer of mulch, ensuring it is adequately thick to suppress weeds.
7. Add Finishing Touches
After installing the pathway, consider adding decorative touches to enhance its charm:
Plants and Flowers: Position flowers or plants along the edges to create a lively and inviting atmosphere.
Pathway Lighting: Incorporate solar lights or lanterns along the pathway for safety and ambiance in the evenings.
Decorative Stones: Use decorative stones or pebbles to fill in gaps around larger stones or pavers, adding texture.
Accessories: Consider adding garden art, furniture, or decorative pots along the path to personalize your space.
Maintaining Your Garden Pathway
Once your pathway is installed, it’s essential to maintain it to ensure it remains in good condition. Regular upkeep will enhance its longevity and appearance.
1. Regular Cleaning
Remove any debris, leaves, or weeds from the pathway regularly. Using a broom, rake, or pressure washer can help keep surfaces clean and safe from slipping hazards.
2. Weeding
Be proactive in preventing weeds from growing along and within your pathway. Pull weeds by hand or use appropriate weed control methods to keep your pathway clear.
3. Repairing Damage
Occasionally inspect your pathway for any damage, such as settling, cracking, or shifts in the surface. Promptly address any issues by replenishing loose materials or re-leveling pavers.
4. Seasonal Maintenance
During seasonal changes, adjust your maintenance routine accordingly. Remove leaves in the fall, clear snow in winter (if applicable), and refresh mulch or gravel as necessary.
5. Replenishing Materials
Keep an eye on the thickness of mulch or gravel, adding more as needed to maintain an even surface. Regular replenishment will enhance both functionality and aesthetics.
Conclusion
Creating a DIY garden pathway is an excellent way to enhance your landscape, providing charm, accessibility, and functionality. By carefully planning your pathway design, choosing suitable materials, and following the steps outlined in this guide, you can elevate your outdoor space into a welcoming retreat.
Remember that the beauty of a garden pathway lies not only in its practicality but also in its ability to inspire connection with nature. Whether you are walking, planting, or simply enjoying your garden, a thoughtfully designed pathway can make all the difference.


